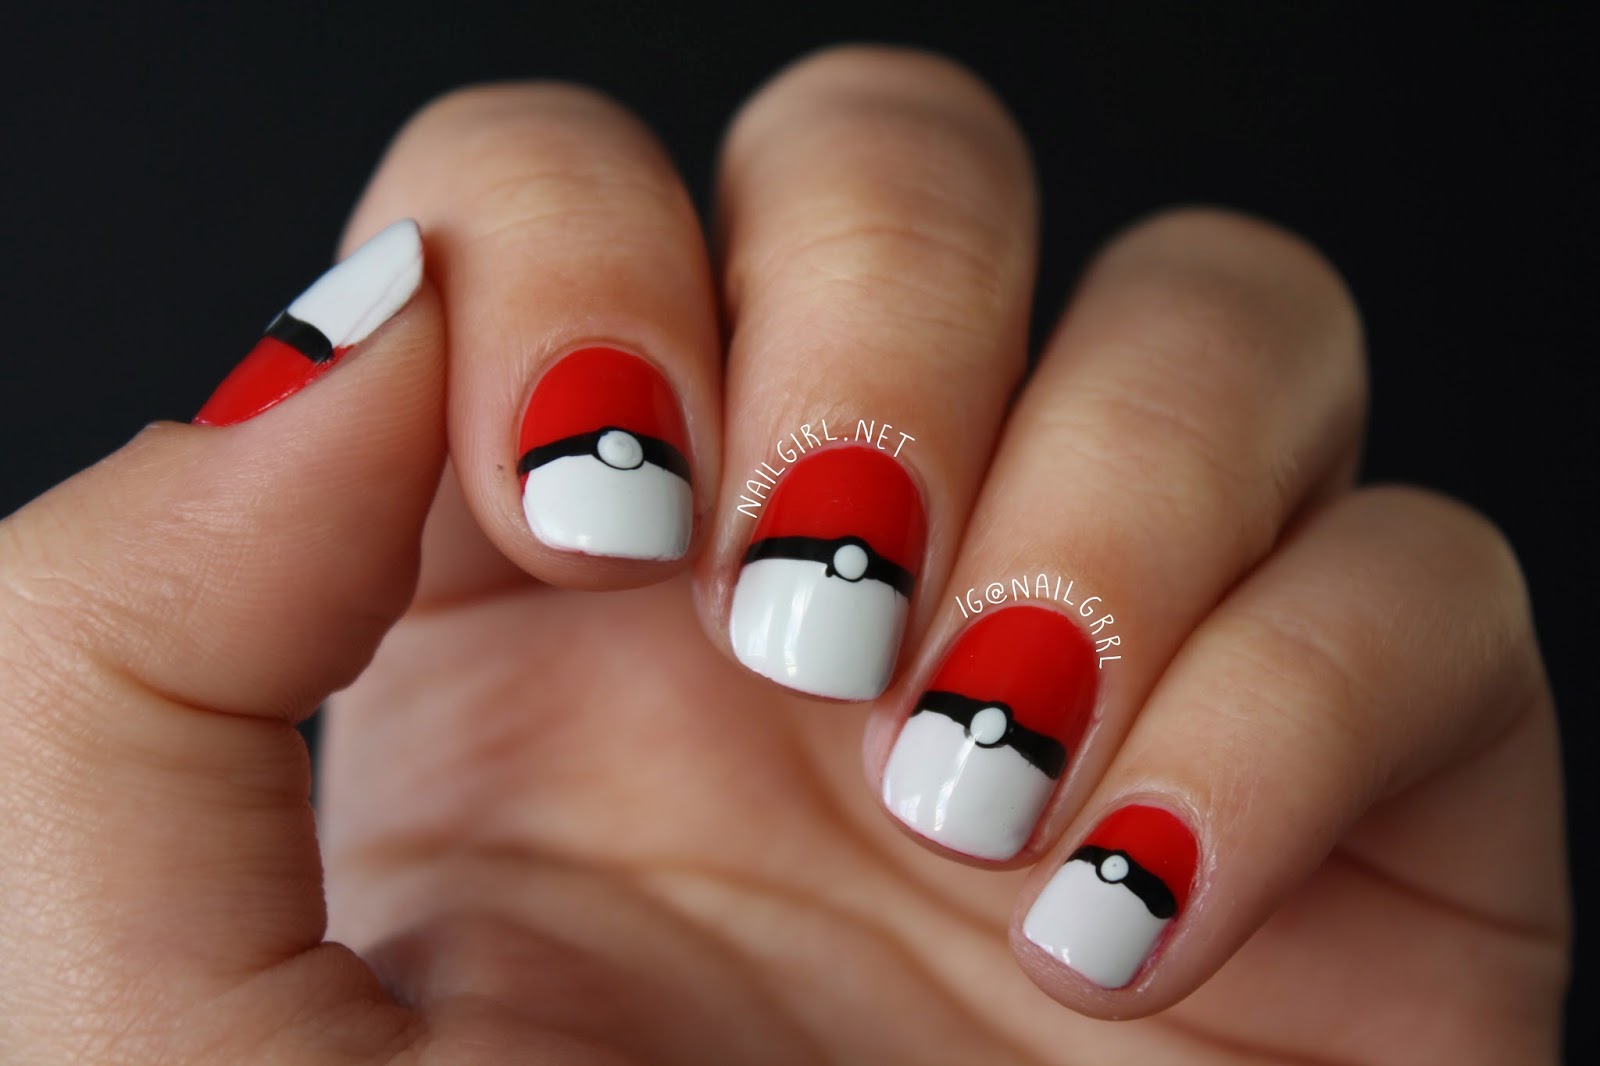
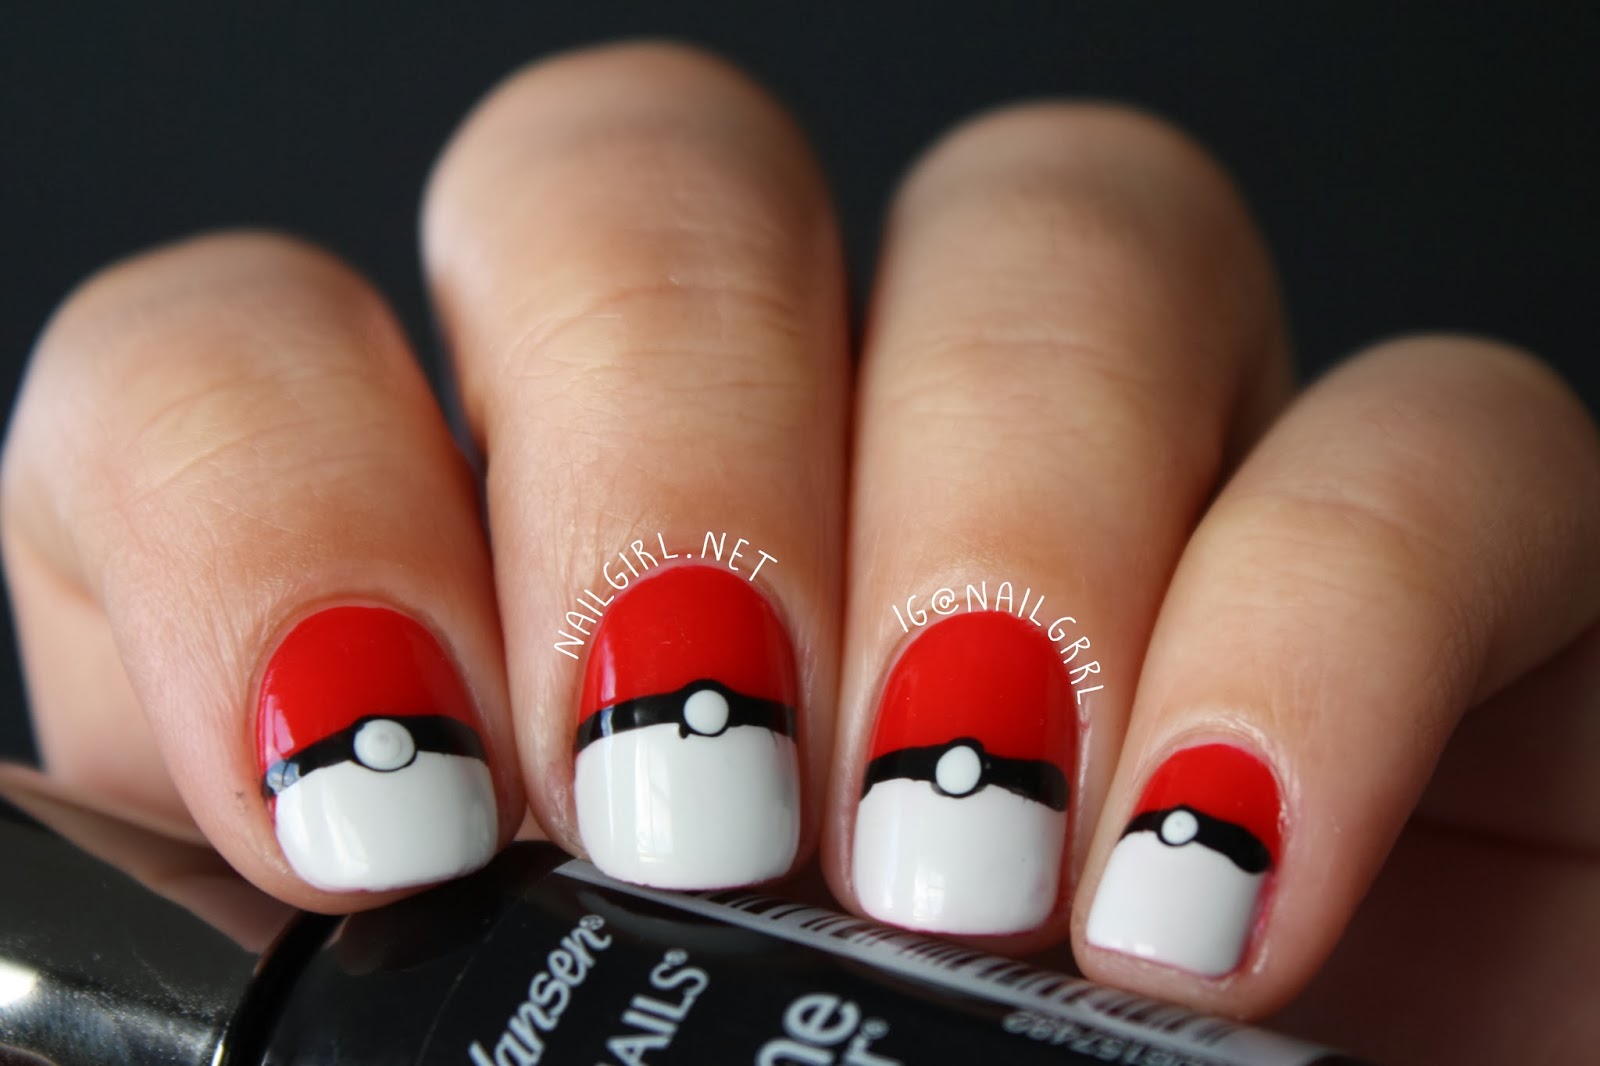
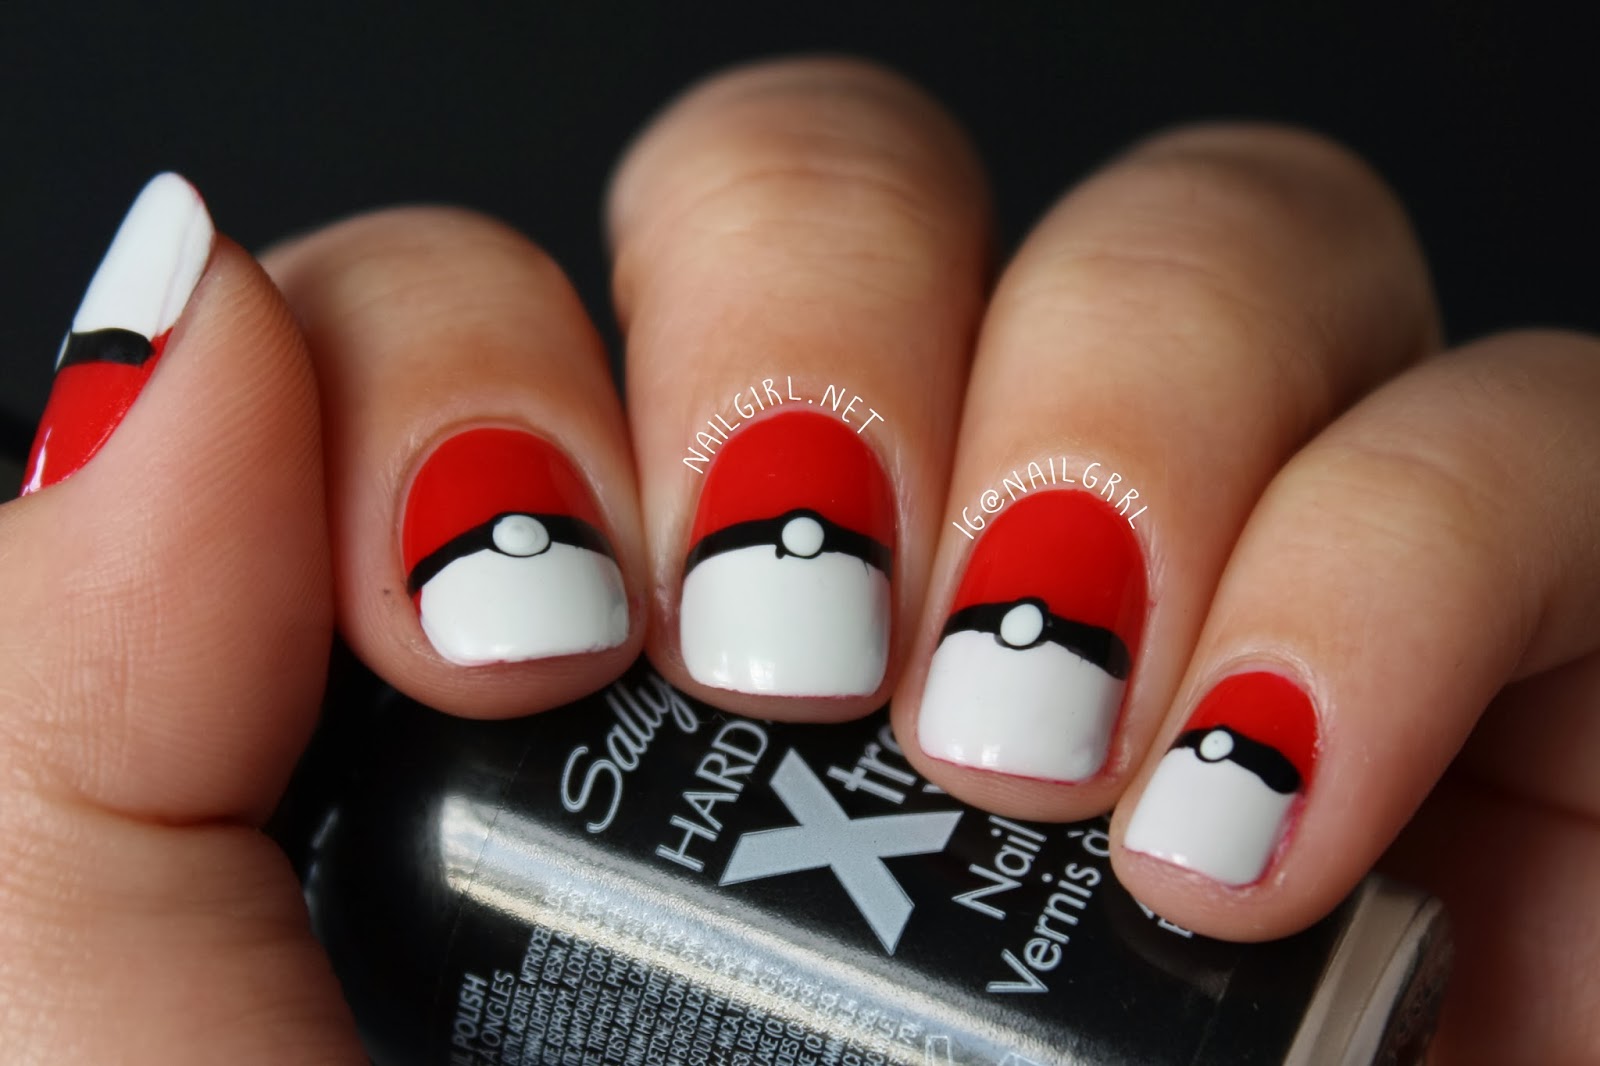
Some of you who follow me on Instagram may know that I play Pokémon a LOT and am a huge fan. So, I have done some really fun Poké Ball nails to commemorate the release of Pokémon X & Y this October 12th! I’m really happy how these have turned out as my first attempt at Poké Ball nails was terrible. These are not perfect but I love them anyways! I’ve also included a tutorial so you can have a crack at these too! I used Zoya Sooki (thanks, Anneke!), Sally Hansen Black Out, and OPI My Boyfriend Scales Walls.


Tutorial time! You’ll need a striping brush, a double ended dotting tool (or two!), red, black and white polish. Remember that it’s best to wait a few minutes between steps to get the best result!

1) Paint a coat of your red polish, and let dry for a few minutes. If you don’t wait, your Poké Ball will be pink on the bottom instead of white!
2) Paint 1 or 2 coats of your white polish, starting from halfway on the nail. It’s okay if this is a little bit messy, as it will be covered by the next step.
3) Using your striping brush and black polish, carefully paint a line across your nail.
4) Using the larger end of your dotting tool, place a black dot in the approximate middle of the black line you just drew.
5) Place a slightly smaller white dot in the black dot you placed to create the Poké Ball ‘button’.
6) Top coat your nail with a high gloss, fast drying top coat to seal in the design! I STRONGLY advise waiting for 5+ minutes before topcoating to prevent smearing your hard work.
I hope you enjoyed my very first tutorial as well as my first freehand nail art! Let me know what you think in the comments.
Lexie x
10 comments
aw man I wish I thought to do this for work today!
Wahhh, so cool!! <3
Yay! They look so good. and my pleasure xx
Aw! Thanks Steph 🙂
So glad you like them! Hope your game is coming along well – I'm forcing myself to study today or else I'd play Pokemon all day again… haha
Thanks, Natalie!
Hi Lexie! I've chosen your blog for the "Versatile blogger award", I hope you'll accept the award 🙂
http://glam-madam.blogspot.co.nz/2013/10/versatile-blogger-award-yippee.html
cheers, pk
Awesome poke balls! I'm debating whether or not to get Pokemon Y or X. I still haven't finished Pokemon White!
Hi Lexie, I've nominated you for the Versatile Blogger Award! Love following your blog, congratulations 🙂
http://kelsieyum.blogspot.co.nz/, Kelsie.
It's soooo good! I definitely recommend it!